✔ Preheat oven to 350°F (175°C).
✔ Grease and flour two 9-inch round cake pans.
2️⃣ Make the Cake Batter
✔ In a bowl, whisk together flour, baking soda, baking powder, cocoa powder, and salt.
✔ In a separate bowl, beat butter, sugar, and oil until light and fluffy.
✔ Add eggs, one at a time, mixing well after each addition.
✔ Mix in vanilla, vinegar, and red food coloring.
✔ Gradually add dry ingredients, alternating with buttermilk, mixing until just combined.
3️⃣ Bake the Cake
✔ Divide batter evenly between the prepared cake pans.
✔ Bake for 30-35 minutes, or until a toothpick inserted in the center comes out clean.
✔ Let cakes cool in pans for 10 minutes, then transfer to a wire rack to cool completely.
4️⃣ Prepare the Cream Cheese Frosting
✔ Beat cream cheese and butter until smooth.
✔ Gradually add powdered sugar and mix until fluffy.
✔ Stir in vanilla extract.
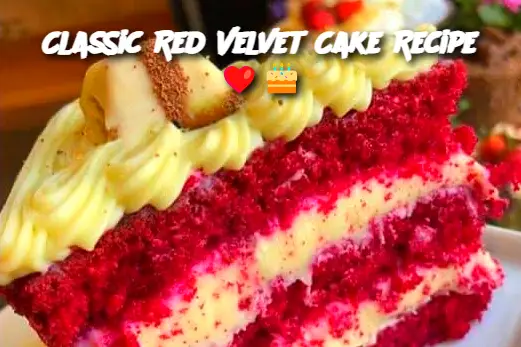
5️⃣ Frost & Assemble
✔ Spread cream cheese frosting over the first cake layer.
✔ Place the second layer on top and frost the entire cake.
✔ Decorate with red velvet crumbs, sprinkles, or chocolate shavings!
🥄 Serving & Storage Tips
✔ Serve at room temperature for the best flavor.
✔ Store in the refrigerator for up to 5 days.
✔ Freeze unfrosted cake layers for up to 3 months.
🔥 Variations & Customization
🔹 Cupcakes – Divide batter into muffin tins and bake for 18-20 minutes.
🔹 Chocolate Lover’s Twist – Add ½ cup melted chocolate to the batter. 🍫
🔹 Nutty Addition – Fold in ½ cup chopped pecans or walnuts.
❓ FAQ – Your Questions Answered!
Q: Why does Red Velvet Cake need vinegar?
A: It reacts with baking soda and cocoa, creating a lighter, fluffier texture.
Q: Can I make it without buttermilk?
A: Yes! Substitute 1 cup milk + 1 tbsp lemon juice/vinegar.
Q: Why isn’t my cake red enough?
A: Use gel food coloring for a deeper red hue.
🏆 Final Thoughts – A Classic Beauty!
This Red Velvet Cake is the perfect combination of rich, moist cake and creamy frosting. Whether for a special occasion or a sweet treat, this recipe will impress every time!
